Configuring a Raspberry Pi Image for the Neato
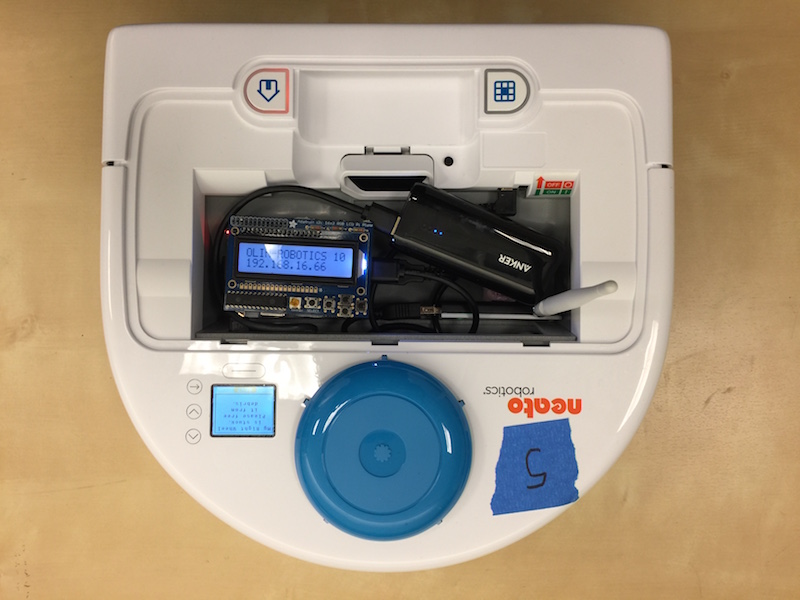
The Neato setup requires a Raspberry Pi to act as a remote control interface between the student laptop and the robot. We have created a setup based on a Raspberry Pi with an accompanying 16x2 LCD panel (for displaying debug information regarding Wifi).
Once you’ve purchased the relevant hardware and completed the setup of the LCD panel (it requires about 30 minutes of soldering), you are ready to go.
Configuring the Raspberry Pi Image
Starting with a MicroSD card with at least 8GB capacity, perform the following steps.
- Flash the SD card with the latest version of Raspberry Pi OS Lite (the lite version will make sure you don’t have a desktop environment installed). The Raspberry Pi Imager software makes doing this a breeze.
- As of 2024/2025, we recommend installing a 32-bit OS Lite Legacy version of Raspbian and Debian (Debian 11 bullseye). You can view other images here.
- When using the imager, be sure to configure the advanced settings for your RPi (enable SSH, set your password (we recommend using the default
pilogin), and add your target Wifi SSID and password).
- Startup the Pi and connect either via SSH (if you know what IP address the RPi will be assigned or can sniff it on your network) or via direct ethernet connection.
- Execute the following command. You’ll be prompted to enter your Wifi SSID and password.
$ source <(curl http://occam.olin.edu/install_pi)Note that there is a known issue with some installs returning a
no `break-system-packages` modulefor pip3 when attempting to install the Adafruit shield display packages. This is likely because you have a pip3 version older than 21.3 and will thus need to update pip3. To do this, run (as sudo or su)pip3 install --upgrade pipthen rerun thesetup.shfile found in the directory installed when running the original command. Specifically, assurun./setup.sh SSID passwordthenreboot. Everything should now be all set.
Note, depending on your Wifi adapter, you may need to install additional drivers. For instance, the TP-Link Archer High Gain T2U requires a non-default adapter driver (RTL8812au) which can be found here. We recommend using adapters with known Linux support for ease.
Operating Instructions
Once you’ve created the image, use one of the micro USB cables to connect the Neato to the Raspberry Pi. Use the other micro USB cable to connect the USB battery pack to the power input port of the the Pi. If you have a Raspberry Pi Cam module, you can connect that as well (currently, we don’t support the new rev 3 camera). All other operating instructions are given in the student-facing guide on operating the robots.